Step 1 – Login into ESS Portal
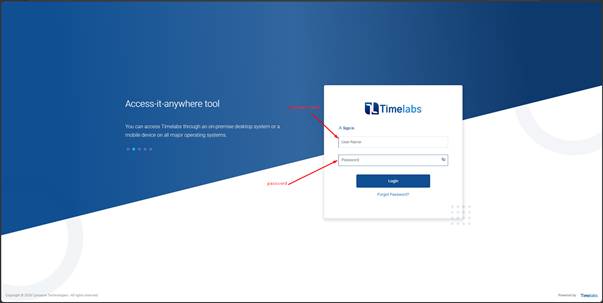
Open the application login page and log in using your Employee Credentials.
Step 2 – Navigate to Recruitment section
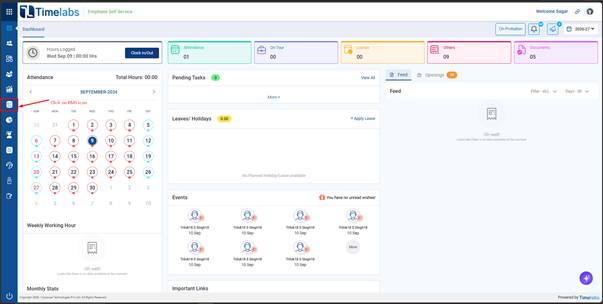
After successful login, you will be redirected to the ESS Dashboard. From the left navigation panel, select Recruitment icon to access the Recruitment section.
Step 3 – Open Manpower Requisition
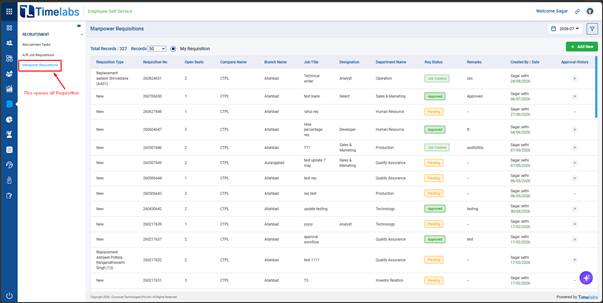
Under Recruitment section, select Manpower Requisition to access the requisition section.
Step 4 – Click Add New
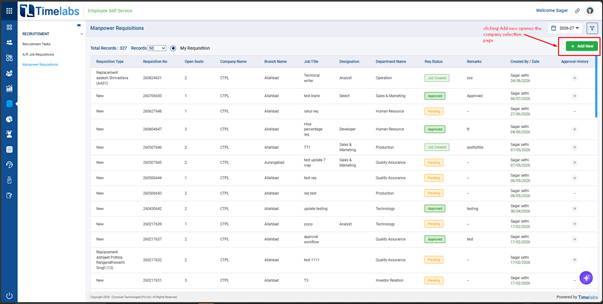
On the Manpower Requisition page, click Add New to initiate a new requisition.
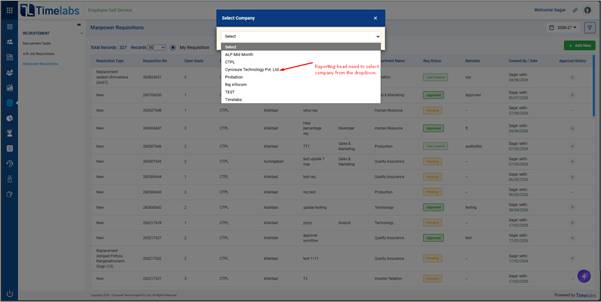
Step 5 – Select Company
After clicking Add New, the Select Company window will appear.
Select the required company for which the job requisition needs to be raised.
Step 6 – Enter Job Requisition Details
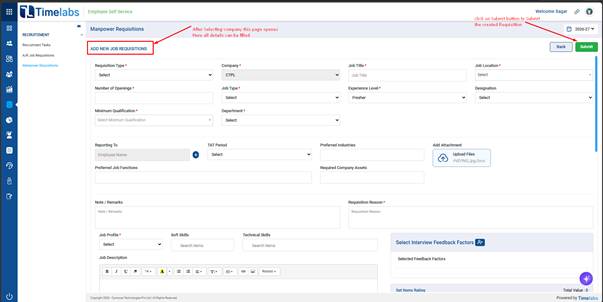
After selecting the company, the Add New Job Requisition page will open.
Enter all the required details related to the job requisition, ensuring that the mandatory fields are completed correctly.
Step 7 – Submit the Requisition
Review the entered information and click Submit to raise the requisition.
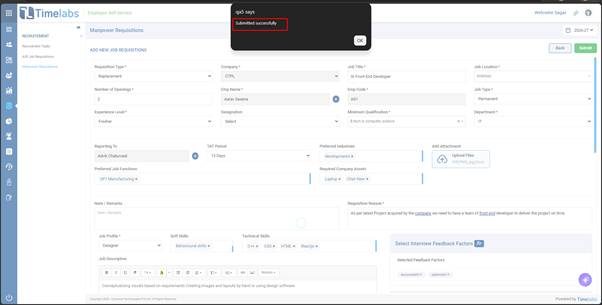
Once submitted successfully, the requisition will be created in the system.
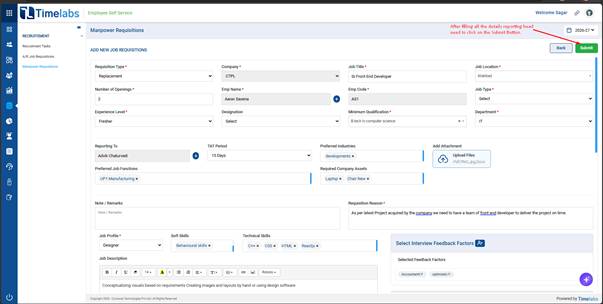
Here is the detailed description of important fields of Job Requisition Form:
Requisition Type: Under Requisition Type select “New Requirement or Replacement”, and if you select Replacement option then specify the “Name and Employee Code” details of the employee you are replacing.
Company : Select desired company from available list
Job Title: Provide a specific job title for the vacancy (e.g., Account Executive, HR Manager, etc.).
Job Location: Select the appropriate job location for the new job vacancy from the list. (Branches/Location are created in the Attendance Module)
Job Type: Choose the job type such as Permanent, Contract, etc.
Number of Openings: Update the “Number of Openings” field for the New Man Power.
Experience Level: Enter the desired experience level (experience levels can be managed in RMS module under Setup -> Job Settings -> Experience Levels).
Designation: Select the designation from the list (designation are created in the Attendance Module).
Minimum Qualification: Specify the minimum qualifications required for the job.
Department: Select the department from the list (departments are created in the Attendance Module).
Requisition Reason: Update the reason for creating the new requisition.
Job Profile: Select the appropriate job profile for the new job vacancy from the list. Job profiles are created in RMS module under Setup -> Job Settings -> Job Profiles.
Skill Set & Location Section:
Technical Skills: Specify the technical skills required for the job.
Soft Skills: Specify any soft skills needed for the role.
Job Description: Automatically populated based on the selected job profile. You can edit it here if needed.
Responsibilities: Automatically populated based on the selected job profile. Edit if necessary.
Requirements: Automatically populated based on the selected job profile. Edit if necessary.
Step 8 – View the Requisition
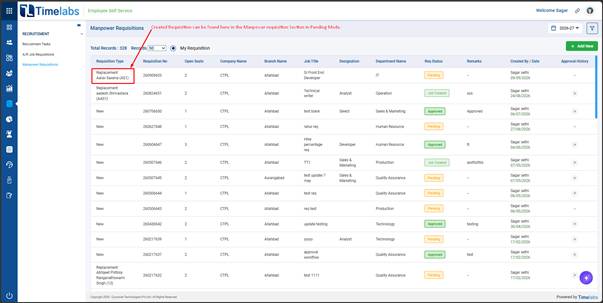
After submission, navigate to the My Requisition section.
The newly raised requisition will be displayed here along with its current status.
Was this article helpful?
That’s Great!
Thank you for your feedback
Sorry! We couldn't be helpful
Thank you for your feedback
Feedback sent
We appreciate your effort and will try to fix the article